# Webpack性能优化
# 打包分析
前提
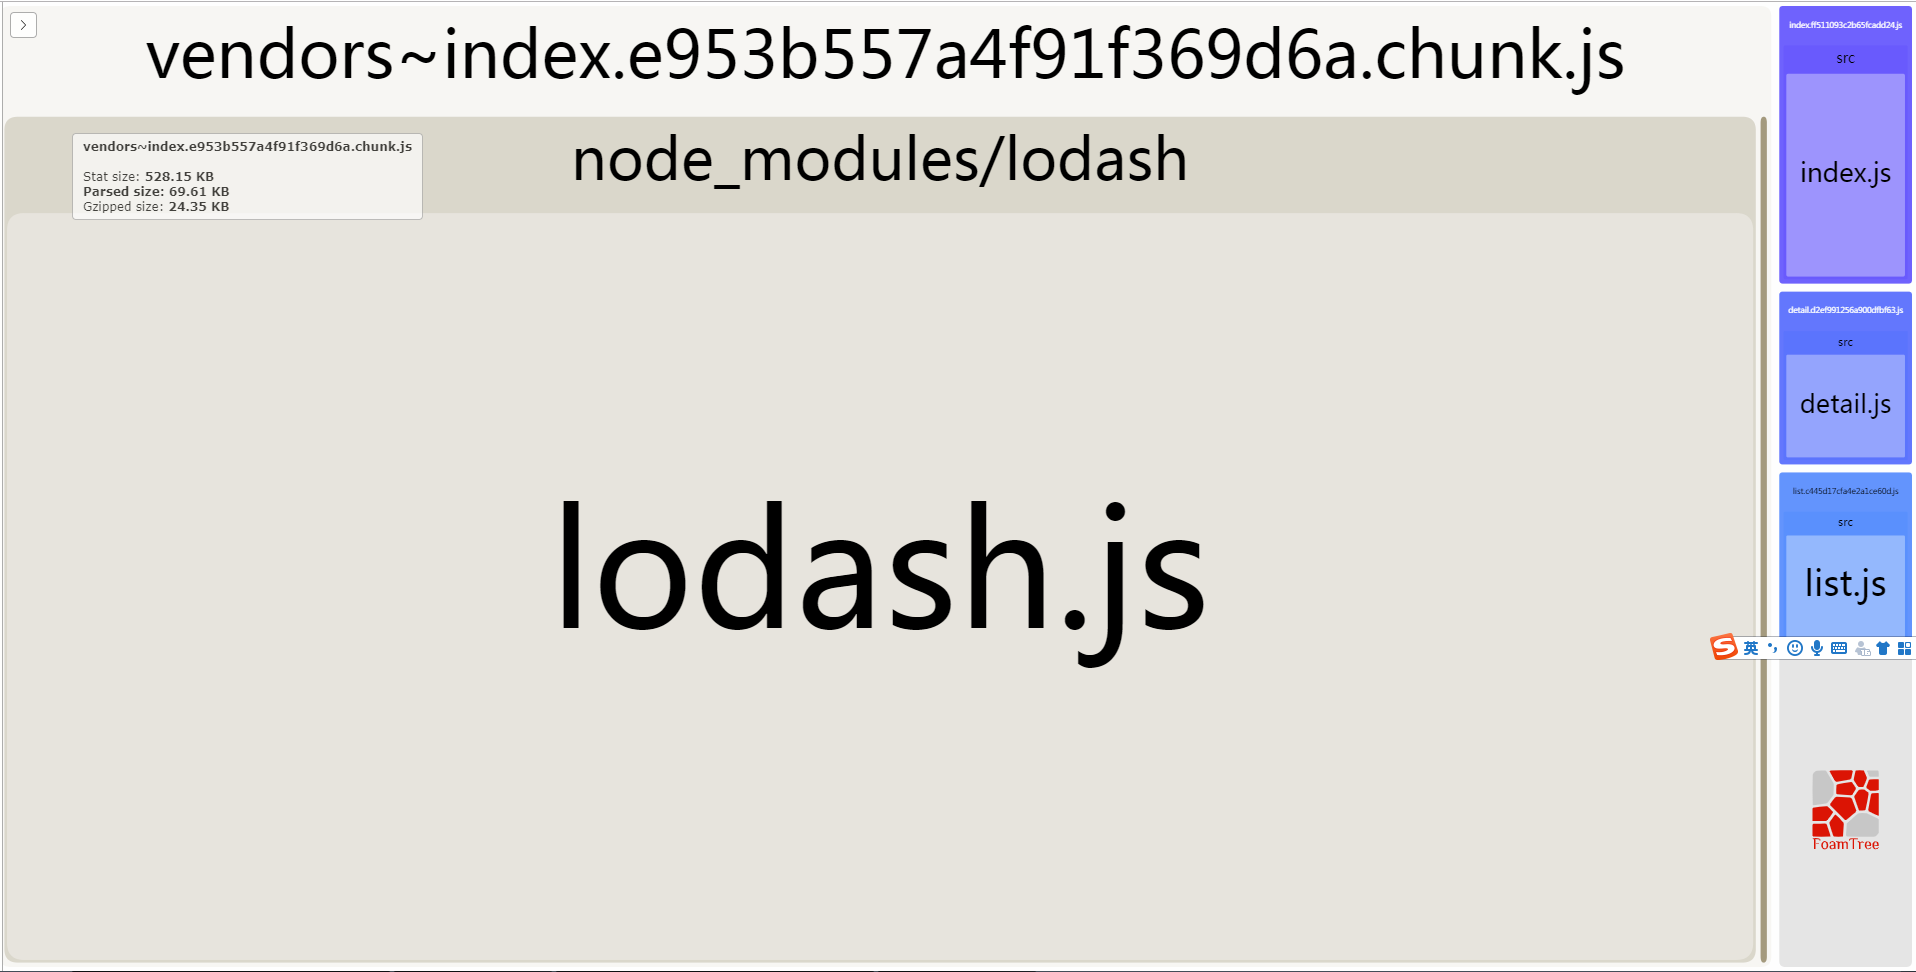
在进行 Webpack 性能优化之前,如果我们知道我们每一个打包的文件有多大,打包时间是多少,它对于我们进行性能优化是很有帮助的,这里我们使用webpack-bundle-analyzer来帮助我们解决这个问题。
首先需要使用如下命令去安装这个插件:
$ npm install webpack-bundle-analyzer --save-dev
安装完毕后,我们需要在webpack.prod.js文件中做一点小小的改动:
const BundleAnalyzerPlugin = require('webpack-bundle-analyzer').BundleAnalyzerPlugin;
const prodConfig = {
  // 其它配置项
  mode: 'production',
  plugins: [
    new BundleAnalyzerPlugin()
  ]
}
配置完毕后,我们运行npm run build命令来查看打包分析结果,以下打包结果仅供参考:

# 缩小文件的搜索范围
理解
首先我们要弄明白 Webpack 的一个配置参数(Resolve)的作用:它告诉了 Webpack 怎么去搜索文件,它同样有几个属性需要我们去理解:
extensions:它告诉了 Webpack 当我们在导入模块,但没有写模块的后缀时应该如何去查找模块。mainFields:它告诉了 Webpack 当我们在导入模块,但并没有写模块的具体名字时,应该如何去查找这个模块。alias:当我们有一些不得不引用的第三方库或者模块的时候,可以通过配置别名,直接引入它的.min.js文件,这样可以库内的直接解析- 其它
include、exclude、test来配合loader进行限制文件的搜索范围
# extensions参数
就像上面所说的那样,extensions它告诉了 Webpack 当我们在导入模块,但没有写模块的后缀时,应该如何去查找模块。这种情况在我们开发中是很常见的,一个情形可能如下所示:
// 书写了模块后缀
import main from 'main.js'

// 没有书写模块后缀
import main from 'main'
像上面那样,我们不写main.js的.js后缀,是因为 Webpack 会默认帮我们去查找一些文件,我们也可以去配置自己的文件后缀配置:
注意
extensions参数应尽可能只配置主要的文件类型,不可为了图方便写很多不必要的,因为每多一个,底层都会走一遍文件查找的工作,会损耗一定的性能。
module.exports = {
  // 其它配置
  resolve: {
    extensions: ['.js', '.json', '.vue']
  }
}
如果我们像上面配置后,我们可以在代码中这样写:
// 省略 .vue文件扩展
import BaseHeader from '@/components/base-header';

// 省略 .json文件扩展
import CityJson from '@/static/city';
# mainFields参数
mainFields参数主要应用场景是,我们可以不写具体的模块名称,由 Webpack 去查找,一个可能的情形如下:
// 省略具体模块名称
import BaseHeader from '@components/base-header/';

// 以上相当于这一段代码
import BaseHeader from '@components/base-header/index.vue';
// 或者这一段
import BaseHeader from '@components/base-header/main.vue';
我们也可以去配置自己的mainFields参数:
说明
同extensions参数类似,我们也不建议过多的配置mainFields的值,原因如上。
module.exports = {
  // 其它配置
  resolve: {
    extensions: ['.js', '.json', '.vue'],
    mainFields: ['main', 'index']
  }
}
# alias参数
alias参数更像一个别名,如果你有一个目录很深、文件名很长的模块,为了方便,配置一个别名这是很有用的;对于一个庞大的第三方库,直接引入.min.js而不是从node_modules中引入也是一个极好的方案,一个可能得情形如下:
注意
通过别名配置的模块,会影响Tree Shaking,建议只对整体性比较强的库使用,像lodash库不建议通过别名引入,因为lodash使用Tree Shaking更合适。
// 没有配置别名之前
import main from 'src/a/b/c/main.js';
import React from 'react';

// 配置别名之后
import main from 'main.js';
import React from 'react';
// 别名配置
const path = require('path');
module.exports = {
  // 其它配置
  resolve: {
    extensions: ['.js', '.json', '.vue'],
    mainFields: ['main', 'index'],
    alias: {
      main: path.resolve(__dirname, 'src/a/b/c'),
      react: path.resolve(__dirname, './node_modules/react/dist/react.min.js')
    }
  }
}
# Tree Shaking去掉冗余的代码
说明
Tree Shaking配置我们已经在上面讲过,配置Tree Shaking也很简单。
module.exports = {
  // 其它配置
  optimization: {
    usedExports: true
  }
}
如果你对Tree Shaking还不是特别理解,请点击Tree Shaking阅读更多。
# DllPlugin减少第三方库的编译次数
对于有些固定的第三方库,因为它是固定的,我们每次打包,Webpack 都会对它们的代码进行分析,然后打包。那么有没有什么办法,让我们只打包一次,后面的打包直接使用第一次的分析结果就行。答案当然是有的,我们可以使用 Webpack 内置的DllPlugin来解决这个问题,解决这个问题可以分如下的步骤进行:
- 把第三方库单独打包在一个
xxx.dll.js文件中 - 在
index.html中使用xxx.dll.js文件 - 生成第三方库的打包分析结果保存在
xxx.manifest.json文件中 - 当
npm run build时,引入已经打包好的第三方库的分析结果 - 优化
# 单独打包第三方库
步骤
为了单独打包第三方库,我们需要进行如下步骤:
- 根目录下生成
dll文件夹 - 在
build目录下生成一个webpack.dll.js的配置文件,并进行配置。 - 在
package.json文件中,配置build:dll命令 - 使用
npm run build:dll进行打包
生成dll文件夹:
$ mkdir dll
在build文件夹下生成webpack.dll.js:
$ cd build
$ touch webpack.dll.js
创建完毕后,需要在webpack.dll.js文件中添加如下代码:
const path = require('path');
module.exports = {
  mode: 'production',
  entry: {
    vendors: ['lodash', 'jquery']
  },
  output: {
    filename: '[name].dll.js',
    path: path.resolve(__dirname, '../dll'),
    library: '[name]'
  }
}
最后需要在package.json文件中添加新的打包命令:
{
  // 其它配置
  "scripts": {
    "dev": "webpack-dev-server --config ./build/webpack.dev.js",
    "build": "webpack --config ./build/webpack.prod.js",
    "build:dll": "webpack --config ./build/webpack.dll.js"
  }
}
使用npm run build:dll打包结果,你的打包结果看起来是下面这样的:
|-- build
|   |-- webpack.common.js
|   |-- webpack.dev.js
|   |-- webpack.dll.js
|   |-- webpack.prod.js
|-- dll
|   |-- vendors.dll.js
|-- src
|   |-- index.html
|   |-- index.js
|-- package.json
# 引用xxx.dll.js文件
在上一小节中我们成功拿到了xxx.dll.js文件,那么如何在index.html中引入这个文件呢?答案是需要安装add-asset-html-webpack-plugin插件:
$ npm install add-asset-html-webpack-plugin -D
在webpack.common.js中使用add-asset-html-webpack-plugin插件:
const addAssetHtmlWebpackPlugin = require('add-asset-html-webpack-plugin');
const configs = {
  // 其它配置
  plugins: [
    new addAssetHtmlWebpackPlugin({
      filepath: path.resolve(__dirname, '../dll/vendors.dll.js')
    })
  ]
}
module.exports = configs;
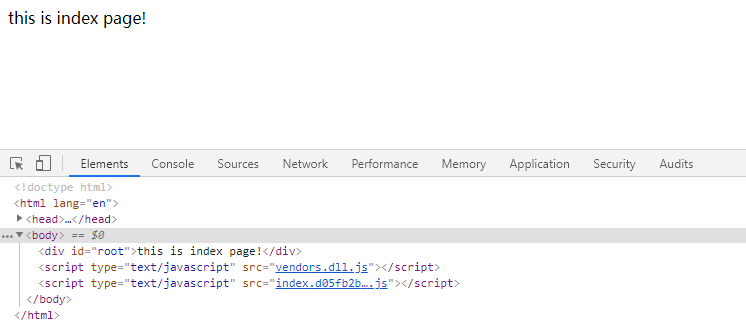
我们将第三方库全局暴露了一个vendors变量,现引入xxx.dll.js文件结果如下所示:

# 生成打包分析文件
在webpack.dll.js中使用 Webpack 内置的DllPlugin插件,进行打包分析:
const path = require('path');
const webpack = require('webpack');
module.exports = {
  mode: 'production',
  entry: {
    vendors: ['lodash', 'jquery']
  },
  output: {
    filename: '[name].dll.js',
    path: path.resolve(__dirname, '../dll'),
    library: '[name]'
  },
  plugins: [
    new webpack.DllPlugin({
      name: '[name]',
      path: path.resolve(__dirname, '../dll/[name].manifest.json')
    })
  ]
}
# 引用打包分析文件
在webpack.common.js中使用 Webpack 内置的DllReferencePlugin插件来引用打包分析文件:
const htmlWebpackPlugin = require('html-webpack-plugin');
const cleanWebpackPlugin = require('clean-webpack-plugin');
const addAssetHtmlWebpackPlugin = require('add-asset-html-webpack-plugin');
const webpack = require('webpack');
const path = require('path');
module.exports = {
  // 其它配置
  plugins: [
    new cleanWebpackPlugin(),
    new htmlWebpackPlugin({
      template: 'src/index.html'
    }),
    new addAssetHtmlWebpackPlugin({
      filepath: path.resolve(__dirname, '../dll/vendors.dll.js')
    }),
    new webpack.DllReferencePlugin({
      manifest: path.resolve(__dirname, '../dll/vendors.manifest.json')
    })
  ]
}
# 优化
现在我们思考一个问题,我们目前是把lodash和jquery全部打包到了vendors文件中,那么如果我们要拆分怎么办,拆分后又该如何去配置引入?一个可能的拆分结果如下:
const path = require('path');
const webpack = require('webpack');
module.exports = {
  mode: 'production',
  entry: {
    vendors: ['lodash'],
    jquery: ['jquery']
  },
  output: {
    filename: '[name].dll.js',
    path: path.resolve(__dirname, '../dll'),
    library: '[name]'
  },
  plugins: [
    new webpack.DllPlugin({
      name: '[name]',
      path: path.resolve(__dirname, '../dll/[name].manifest.json')
    })
  ]
}
根据上面的拆分结果,我们需要在webpack.common.js中进行如下的引用配置:
const htmlWebpackPlugin = require('html-webpack-plugin');
const cleanWebpackPlugin = require('clean-webpack-plugin');
const addAssetHtmlWebpackPlugin = require('add-asset-html-webpack-plugin');
const path = require('path');
const configs = {
  // ... 其他配置
  plugins: [
    new cleanWebpackPlugin(),
    new htmlWebpackPlugin({
      template: 'src/index.html'
    }),
    new addAssetHtmlWebpackPlugin({
      filepath: path.resolve(__dirname, '../dll/vendors.dll.js')
    }),
     new addAssetHtmlWebpackPlugin({
      filepath: path.resolve(__dirname, '../dll/jquery.dll.js')
    }),
    new webpack.DllReferencePlugin({
      manifest: path.resolve(__dirname, '../dll/vendors.manifest.json')
    }),
    new webpack.DllReferencePlugin({
      manifest: path.resolve(__dirname, '../dll/jquery.manifest.json')
    })
  ]
}
module.exports = configs;
我们可以发现:随着我们引入的第三方模块越来越多,我们不断的要进行 Webpack 配置文件的修改。对于这个问题,我们可以使用Node的核心模块fs来分析dll文件夹下的文件,进行动态的引入,根据这个思路我们新建一个makePlugins方法,它返回一个 Webpack 的一个plugins数组:
const makePlugins = function() {
  const plugins = [
    new cleanWebpackPlugin(),
    new htmlWebpackPlugin({
      template: 'src/index.html'
    }),
  ];

  // 动态分析文件
  const files = fs.readdirSync(path.resolve(__dirname, '../dll'));
  files.forEach(file => {
    // 如果是xxx.dll.js文件
    if(/.*\.dll.js/.test(file)) {
      plugins.push(
        new addAssetHtmlWebpackPlugin({
          filepath: path.resolve(__dirname, '../dll', file)
        })
      )
    }
    // 如果是xxx.manifest.json文件
    if(/.*\.manifest.json/.test(file)) {
      plugins.push(
        new webpack.DllReferencePlugin({
          manifest: path.resolve(__dirname, '../dll', file)
        })
      )
    }
  })
  return plugins;
}
configs.plugins = makePlugins(configs);
module.exports = configs;
使用npm run build:dll进行打包第三方库,再使用npm run build打包,打包结果如下:
说明
本次试验,第一次打包时间为1100ms+,后面的打包稳定在800ms+,说明我们的 Webpack性能优化已经生效。
|-- build
|   |-- webpack.common.js
|   |-- webpack.dev.js
|   |-- webpack.dll.js
|   |-- webpack.prod.js
|-- dist
|   |-- index.html
|   |-- jquery.dll.js
|   |-- main.1158fa9f961c50aaea21.js
|   |-- main.1158fa9f961c50aaea21.js.map
|-- dll
|   |-- jquery.dll.js
|   |-- jquery.manifest.json
|   |-- vendors.dll.js
|   |-- vendors.manifest.json
|-- src
|   |-- index.html
|   |-- index.js
|-- package.json
|-- postcss.config.js
小结:Webpack 性能优化是一个长久的话题,本章也仅仅只是浅尝辄止,后续会有关于 Webpack 更加深入的解读博客,敬请期待(立个flag🚩)。